
Trade show product packaging must work well before, during, and after the event. It needs to protect samples and display pieces in transit, help staff find what they need during setup, support a professional presentation, and make teardown and return shipment manageable. Planning those jobs together can help exhibitors avoid rushed changes and make better use of the materials they send.
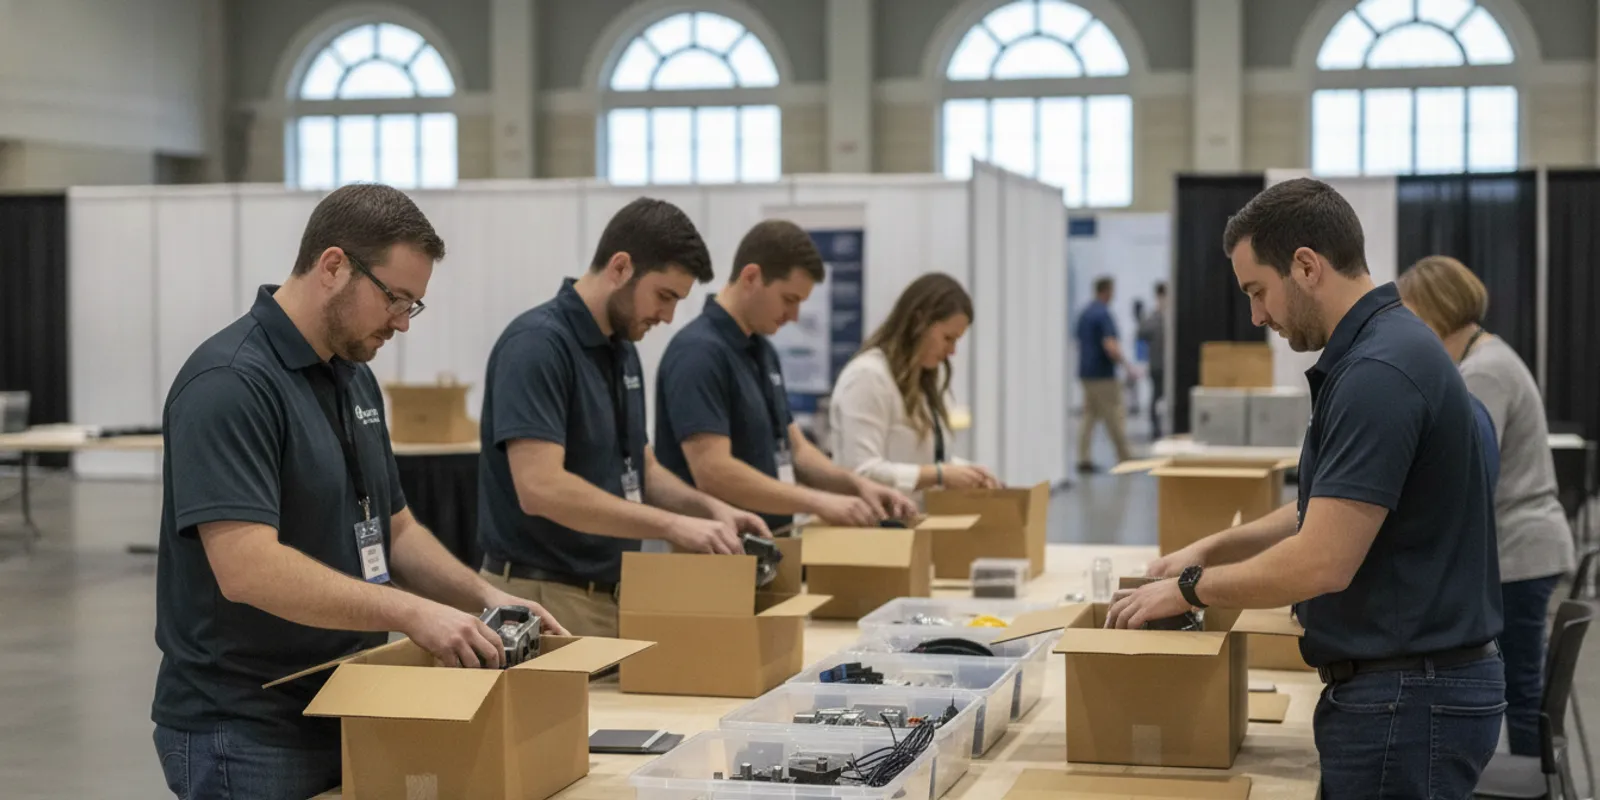
What should trade show product packaging accomplish?
Begin with the full life cycle of each package. A carton may be packed at your facility, moved through a carrier network, handled at a venue, opened by a team member, stored near the booth, repacked, and shipped home. The appropriate design depends on which parts of that path matter most and how often the package will be used.
Write down the job for every package rather than assuming one box should solve every need. Common jobs include:
- Protecting products: Keep samples from shifting, colliding, or rubbing against surfaces that can be scratched or marked.
- Grouping related pieces: Keep accessories, display hardware, cables, literature, and samples together so the team can find them.
- Supporting setup: Make the opening sequence and retrieval of first-needed items clear.
- Presenting the product: Create an orderly, intentional appearance when a package or kit is opened in front of a prospect.
- Enabling return or reuse: Make it practical to put items back in their protective positions and store them for the next event.
These jobs can compete. A compact carton may reduce the space taken in a shipment but leave little room for cushioning. A presentation-oriented package may look polished but be difficult to reuse. Decide which requirements are essential for each product and which are secondary. If samples and display parts have different handling needs, separating them into purpose-built packages may be more practical than combining everything.
How do you map products and event logistics?
Build an inventory before you choose box sizes or protective materials. Include the main samples, backup units, display pieces, signs, literature, cables, tools, and small accessories. For each item, note its approximate length, width, height, weight, quantity, and any fragile or easily marked areas. Record whether it travels assembled or broken down, and whether it needs to be reached early during setup.
Next, trace the route from the packing area to the booth and back. Identify the shipping method, expected transfers, people handling the packages, and where cartons will be staged. A package delivered to a venue may pass through several hands before your team sees it. Confirm deadlines, delivery instructions, receiving arrangements, and any show-specific handling requirements with the event organizer and carrier. Do not assume that instructions for one leg of a journey cover every leg.
Carrier packaging and mailing information can change, so check the applicable carrier’s current guidance for the service you plan to use. For USPS shipments, start with the USPS homepage and confirm the details for your selected service before packing. This is a reminder to verify current requirements, not a substitute for the rules of a different carrier or the event venue.
For each shipment, make a short route and responsibility note:
- Who packs and checks the contents?
- Where and when is the shipment handed off?
- Who receives it at the venue, and how will the team identify it?
- Where are empty cartons and inserts kept during the event?
- Who is responsible for repacking and arranging return transportation?
A quick route map can expose issues early. A long display panel might fit in a carton but be awkward to carry from a receiving area to the booth. A deep carton may hold all the components but require more floor space to unpack than the team has available. These are packaging decisions as much as event-planning details.
How should you choose the box and protective materials?
Match the outer package to the product, shipment, and handling routine. Stock boxes can work for common sample sizes and straightforward shipping. Custom corrugated boxes can accommodate unusual dimensions, grouped products, or a specific opening sequence. Foam packaging and other inserts can help support delicate or irregular shapes and separate items that should not touch. Packaging supplies such as cushioning and protective wrap may complete a solution where a fitted insert is not needed.
Measure the product at its widest points, including handles, edges, or protrusions. Volk’s box size calculator can help teams think through dimensions, but confirm any proposed size against the actual product and protective materials. Allow room for those materials and for a person to lift the item out without forcing it. Too much unfilled space can let contents move; an overly tight fit can make removal difficult or put pressure on sensitive parts. For a kit, consider layers: heavier items low, parts that can scratch each other separated, and first-needed components placed where they can be reached without emptying the package.
| Packaging approach | Useful when | Questions to resolve |
|---|---|---|
| Stock corrugated box | Products fit common sizes and the shipment has a simple arrangement | Is there room for protection? Can the carton be reused for the return trip? |
| Custom corrugated box | Dimensions, grouping, or the opening sequence need a tailored format | Are measurements, quantities, and handling steps documented accurately? |
| Foam packaging or inserts | Items need individual support or separation from other contents | Can staff remove, inspect, and replace items without struggling? |
| Printed packaging | Identification or a finished brand presentation is important | Which panels will be visible, and are artwork and timing approved? |
Many event kits combine approaches. A custom corrugated outer box can hold reusable inserts, while smaller stock cartons organize accessory groups. The best configuration is the one that protects the actual items and makes the intended workflow repeatable. Review custom corrugated boxes and packaging supplies as you compare formats, and share product measurements and use conditions with a packaging supplier.
How can packaging make setup and teardown easier?
Design around the work your event team will do, not just the closed carton. Think about how many people will unpack the shipment, how much time is available, whether they will have tools, and whether they can spread the contents across a table. Arrange components in the order they are needed. If the display base must be installed before sample holders, the base should not be buried under items needed later.
Keep related components together and make the packing order easy to understand. A packing list inside each carton can identify contents and their intended destination, such as booth display, sample table, or literature area. A copy with the event lead provides a quick way to check whether everything arrived. If you use several similar cartons, establish a clear label convention and apply it consistently. Labels should help staff make a decision quickly, not simply repeat a product name.
Try a handoff test before the event. Ask someone who did not pack the kit to open it using the available instructions. Notice whether they can identify the top, find the first-needed parts, and remove the product safely. Then ask that person to repack the items. Record pauses, missing steps, hard-to-reinstall protective pieces, and any part that could be misplaced. Revise the layout or instructions based on what the test reveals.
Teardown needs the same attention. People may be tired, the booth may need to be cleared quickly, and several staff members may be packing at once. Mark where each component belongs in the return arrangement, and decide who checks the final contents. A simple photo of the open package can help another team member restore the arrangement without relying on memory.
What role should printing and presentation play?
Custom printing can support product identification and brand presentation, but it should serve the package’s actual job. A shipping carton may need clear identification for your team, while a kit opened during a customer conversation may benefit from a more considered reveal. Decide which surfaces will be visible and what information each user needs before developing artwork.
Confirm artwork, logo files, color choices, placement, and approval responsibility early. Check how folds, flaps, tape, shipping labels, and protective layers affect visibility. Keep essential shipping information separate from decorative graphics and follow the carrier’s instructions for labels. Digital and flexographic printing offer different production options; discuss the expected quantity, print coverage, and schedule with the supplier rather than choosing a method based on appearance alone.
Presentation also comes from the way the product fits. A tidy insert, components grouped in a logical order, and clean package surfaces can contribute to a professional interaction. Printed graphics cannot compensate for a sample that is difficult to reach or a kit that arrives disorganized. If you plan to use the package across multiple events, consider how it will hold up to opening, repacking, labeling, and storage.
How can you coordinate effectively with a packaging supplier?
A useful packaging discussion starts with operational details. Share measurements and weights, quantities per carton, photos or drawings if available, sensitive surfaces, and any components that must not touch. Explain how the package travels, how the event team opens it, whether it will be reused, and what happens after teardown. If different events require different product combinations, describe those variations instead of giving only one typical example.
Include the schedule as well as the specifications. Work backward from the date the shipment must be packed and handed off. Allow time for the initial design conversation, any prototype or sample review, artwork approval, revisions, production, and delivery. Identify who has authority to approve the design and who will notify the supplier if dimensions, quantities, or contents change. A late change to a display component can affect the fit, protective materials, and printing, so communicate changes as soon as they are known.
For a packaging project, the packaging prototype process can help your team think through sample review and design approval. Volk Packaging is a third-generation, family-owned corrugated packaging manufacturer and distributor serving New England since 1967. Its options include custom corrugated boxes, stock boxes, foam packaging, packaging supplies, custom design, and digital and flexographic printing. Learn more about the Volk Packaging family and send packaging specifications through the Volk Packaging RFQ when you are ready to discuss a project.
Be specific about the decision you need help making. For example, explain that a set of display samples must travel together, that one item has a sensitive finish, and that staff need to remove it without tools. That gives the supplier a concrete problem to solve. If the brief is still evolving, identify what is confirmed and what remains provisional so a concept is not approved against assumptions that later change.
What should you test before approving a design?
A review sample should use the actual product and the materials planned for the shipment. Close it the way the event team will, then assess fit, opening, retrieval, and repacking. A quick practical review does not replace formal testing where a product or shipping program requires it. It can, however, reveal everyday usability problems before the package is produced for an event.
- Check the fit. Confirm the product sits as intended, protective material is in place, and closure does not press on sensitive areas.
- Check orientation. Make sure staff can tell which side opens and whether the package has an intended top or bottom.
- Check access. Open the package using the expected tools and available workspace. Look for places where a cutter could reach the product.
- Check separation. Confirm that parts do not rub, collide, or become tangled when the closed package is moved gently.
- Check repacking. Ask another person to return everything to the package using the instructions and verify that the closure works again.
- Check identification. Review contents lists, labels, and printed elements from the perspective of the people who will use them.
Write down what passed and what needs adjustment. If an item is hard to remove, determine whether the insert needs a finger space, a different orientation, or clearer instructions. If accessories migrate between compartments, consider dividers or a more explicit packing order. If a package cannot be repacked quickly, evaluate whether the arrangement or the return procedure needs to change.
For repeated events, keep the approved configuration with the event plan. A photo, packing diagram, item list, and notes about replacement materials help staff reproduce the intended arrangement. After each show, record what arrived in good condition, what was awkward to handle, and what was missing. Treat those observations as input for the next review, not as a reason to change the package without checking the effect on fit and transport.
How should you plan for storage and return shipping?
Return logistics should be decided before the outbound shipment leaves. Determine whether the original cartons and inserts will be retained, where they can be stored during the show, and who will bring them back to the booth. If empty packaging will not be kept, choose another return approach in advance. Otherwise, the team may have to improvise when time and materials are limited.
Consider the difference between a package that is reusable and one that is simply still present after unpacking. Inspect closures, corners, and protective components after use. If the package has been damaged or no longer holds the contents securely, do not treat it as ready for another shipment just because it is the original carton. Define who can make that call and how replacement materials will be obtained before the next event.
At teardown, check the product and the package before closing the shipment. Confirm that all samples, display components, and accessories are accounted for. Restore the inserts to their intended positions, secure loose items, and update the packing list if anything was used, given away, or left at the booth. Keep damaged or incomplete kits separate from ready-to-ship materials so a problem is visible rather than discovered during the next setup.
For companies attending multiple events, maintain a short package record with the contents, setup notes, return instructions, and responsible owner. This is useful even when the physical package is simple. It helps a new event lead identify missing parts, gives the packing team a repeatable method, and provides a supplier with practical evidence if the design needs revision.
What does a practical planning example look like?
Suppose a manufacturer is taking three samples, one display stand, a small sign, and literature to a regional show. The samples have finished surfaces that should not rub against each other. The stand comes apart into several pieces, and the team needs to set it up before arranging the samples. Rather than packing everything into one open carton, the team can first map the sequence and needs: stand parts first for setup, samples in separate protected positions, and literature in a location where it will stay flat and easy to retrieve.
Next, the team checks dimensions and transport. If the stand pieces fit alongside the samples without movement or excess empty space, a combined custom arrangement might work. If the long pieces make the carton difficult to carry or create risk for the samples, separate packages may be easier to handle. The team compares those options against the actual venue route, not just the packing bench. It also decides whether cartons will be stored for the return trip and who will keep track of them.
For the trial, a colleague who did not pack the shipment opens the sample arrangement and sets up the stand. The colleague notes that the sign is buried under the base and that one sample is difficult to lift from its insert. The team revises the order and fit, then has the colleague repack the kit. Only after this walkthrough does the team confirm artwork, labels, and production timing. This example does not dictate one package format; it shows how a real sequence of use can guide the choice.
What should an exhibitor include in a packaging checklist?
- List every sample, display part, accessory, tool, and printed item.
- Record measurements, weights, quantities, sensitive surfaces, and required orientations.
- Map the outbound route, receiving handoff, booth storage, and return movement.
- Choose cartons, dividers, cushioning, inserts, and protective supplies for the actual items.
- Set the order for opening and setup, then test it with someone who did not pack the shipment.
- Plan labels, contents lists, printing, artwork approval, and any event-specific instructions.
- Schedule design review, sample approval, revisions, production, packing, and delivery.
- Assign owners for checking contents, storing empty packaging, arranging return shipment, and recording issues.
- After the show, note damaged materials, missing components, and changes worth evaluating before the next event.
Keep the checklist with the event plan and revise it using observations from each show. A note such as “sample difficult to lift” is more useful when paired with the specific package and insert position. A note such as “carton awkward to carry” can lead to a route or division-of-load discussion. Concrete details help the next packaging decision address a recurring issue rather than prompting an unnecessary redesign.
Frequently asked questions
Should every trade show sample have its own box?
Not necessarily. A shared carton with dividers or inserts can keep samples organized when they travel together and can be removed safely. Separate cartons may be useful when products need different protection, go to different destinations, or are handled independently. Choose based on the products and the team’s retrieval and return routine.
When should you consider a custom box?
Consider a custom corrugated format when common sizes leave excessive unused space, an unusual shape needs support, or a repeatable arrangement matters. Accurate measurements, product details, and handling information help a supplier evaluate the format against the real use.
How early should packaging be planned?
Start once the event date and product configuration are reasonably clear. Build in time for information gathering, design, any sample review, revisions, artwork approval, production, and delivery. The required schedule depends on the project, so discuss it with the supplier using the date materials must be ready, not only the show date.
Can printed packaging replace booth graphics?
No. Printed packaging can identify or present a product, but a carton and booth signage have different roles. Decide whether each package is for transit, setup, display, or a combination, then coordinate its artwork with the broader event plan.
Discuss your trade show packaging needs
When product protection, setup, presentation, and return shipping are planned together, trade show product packaging can make event preparation more predictable and give your team a clear process to follow.